If you are looking for a file archiver tool, you are at the right place. In this guide, we will discuss; how to download and install WinRAR on Windows 11. If you want to know how to use WinRAR, follow the guide till the end. WinRAR is a trialware file archiver utility for Windows, developed by Eugene Roshal of win.rar GmbH.
It can create and view archives in RAR or ZIP file formats and unpack numerous archive file formats. If you are looking for an open-source alternative, you can install 7-Zip on Windows 11. But I will recommend you use WinRAR as an archiver tool.
How to Download and Install WinRAR on Windows 11
WinRAR is a trialware file archiver tool; with the help of WinRAR, you can compress and extract your zip files.
Now, to download and install WinRAR for free, follow the following steps:
1. Open any browser and search for WinRAR. Or, simply open the link from win-rar.com
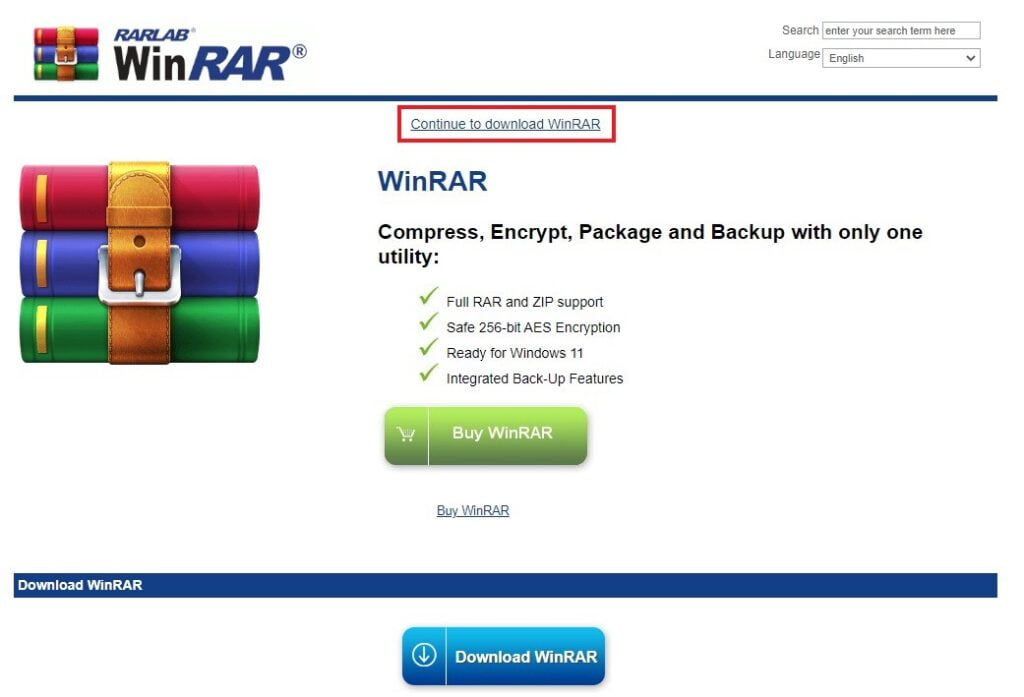
2. On the download page, you will find two versions of WinRAR- free and paid.
3. To download the free version, click the Download WinRAR button.

4. It will redirect you to the download page. To download it for free, click the Download WinRAR button. Or, on the top, you will find a small link – Continue to download WinRAR, click the link to download.

That’s it; this is how you can download WinRAR for free on Windows 11. Now it’s time to install WinRAR on Windows 11 without an error.
How to Install WinRAR on Windows 11
Once you have downloaded the installer file, let us discuss; how to install WinRAR on Windows 11.
For that, follow the steps mentioned below:
1. After the download is complete. Open the downloaded file to install it.
2. Give Windows permission to install the software. Now, it will open a setup window.
3. If you want to change the Destination Folder (Installation Location), you can easily change it by clicking the Browser option. Or else, keep it default and click on the Install button.

4. On the next windows, you will find some WinRAR integration, keep everything to default and click on the OK button. Or, you can also follow the below screenshot.

5. After that, you will get a successfully installed window, click on the Done button.
6. Now you are ready to use WinRAR on your Windows 11 computer to zip and unzip your files.

How to Use WinRAR on Windows 11
Once you have installed WinRAR on your Windows 11, you are ready to compress, files and unzip zipped files on your system.
Here are the steps you can follow to compress and extract zip files:
1. Compress the File Using WinRAR
WinRAR is a popular file compression and archiving tool that allows you to compress large files and folders into smaller archives.
Here’s how to compress a file using WinRAR:
1. To compress files with the help of WinRAR, select the files you want to compress.
2. After that, right-click and hover your mouse over the WinRAR option.
3. Now, click on the Add to Archive option.

4. After that, name your file with the .rar extension. Or, you can select Archive Format from the option.

Note
It will save the compressed file in the same location as the selected files. If you want to change it, click the Browse button to choose a new location. Or, keep it default. You can transfer the compressed file to another location after the process is complete.
5. Then click on the OK button to start the compression process. The time it takes to compress the file depends on its size and the compression settings you have selected.

After the compression is complete, you will see the compressed archive file in the same folder as the original file.
2. Extracting File Using WinRAR
Extracting files from a compressed archive using WinRAR is a straightforward process.
Here’s how to extract a file using WinRAR:
1. Locate the compressed archive file that you want to extract.
2. Right-click on it and select Extract files from the WinRAR context menu.

3. In the Extraction path and options window, you can specify the destination folder; where you want to extract the files.
4. Then click on the OK button to start the extraction process.
Note
If the archive is password-protected. You will get an option to enter the password before the extraction process starts.

After the extraction is complete. You will find the extracted files in the destination folder. After that, you can now use the files as you like.
Conclusion
That’s it; this is how you can download and install WinRAR on Windows 11. Also, you can check our guide on; how to install WinZip on Windows 11. For that, follow the linked guide.
We hope this article was helpful to you. Moreover, if you have some suggestions, do not hesitate to leave them in the comments section. We are always there to assist you.


