In this guide, we’re diving into one of the coolest new features in macOS Sequoia: Window Tiling. If you’re someone who frequently has multiple windows open at once, this feature is about to make your life a whole lot easier. No more relying on third-party apps like Magnet or Rectangle to arrange your windows. With macOS Sequoia, Apple has built this powerful tool right into the system.
Window Tiling in macOS Sequoia lets you effortlessly organize your open windows into a layout that fits your needs and boosts your productivity. Whether you’re working with a few apps or juggling several, this feature helps you keep everything neatly arranged.
How to Use Windows Tiling on macOS
Window Tiling allows you to automatically organize your open windows so they neatly fit into your screen without overlapping. It enhances multitasking by providing a clear, organized layout for your apps. With macOS, this feature has become more intuitive, offering you greater flexibility and ease of use.
Below, we’ll walk you through the different ways to use Window Tiling and help you take full advantage of what macOS Sequoia has to offer.
1. Dragging Windows to Tile
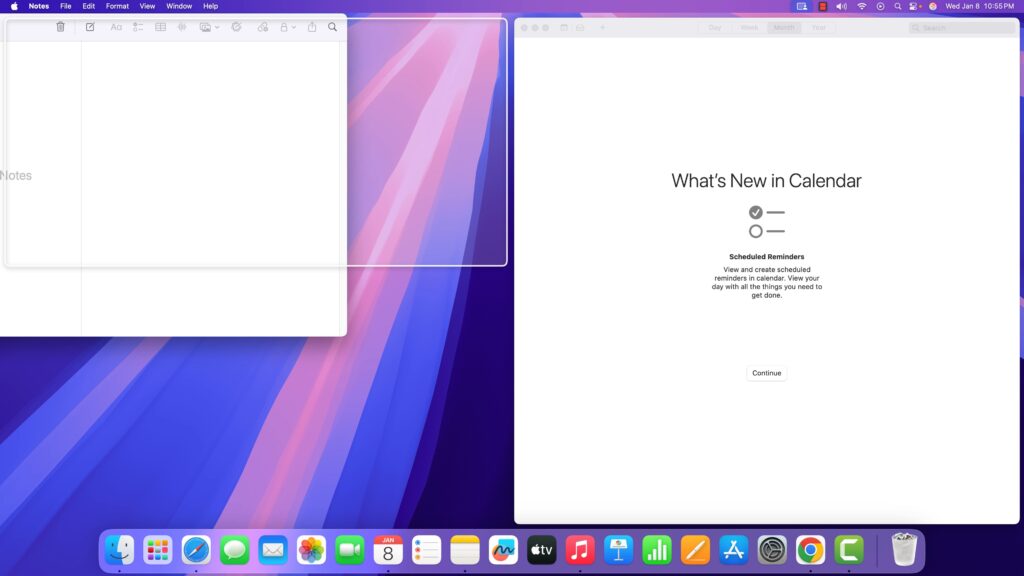
You can easily tile windows by dragging them to the left, right, or any of the four corners of your screen. A grey frame will appear to show you where the window can be placed. Once you release the window, it will automatically snap into position. Tiling windows in all four corners creates a more compact layout, allowing you to have multiple apps visible at once.
Here’s how you can drag windows to tile:
1. Open the application you want to tile.
2. Drag the window to the left side of your screen, and it will automatically cover half of the screen.
3. Similarly, drag the window to the right side of your screen, and it will occupy the right half of your display.
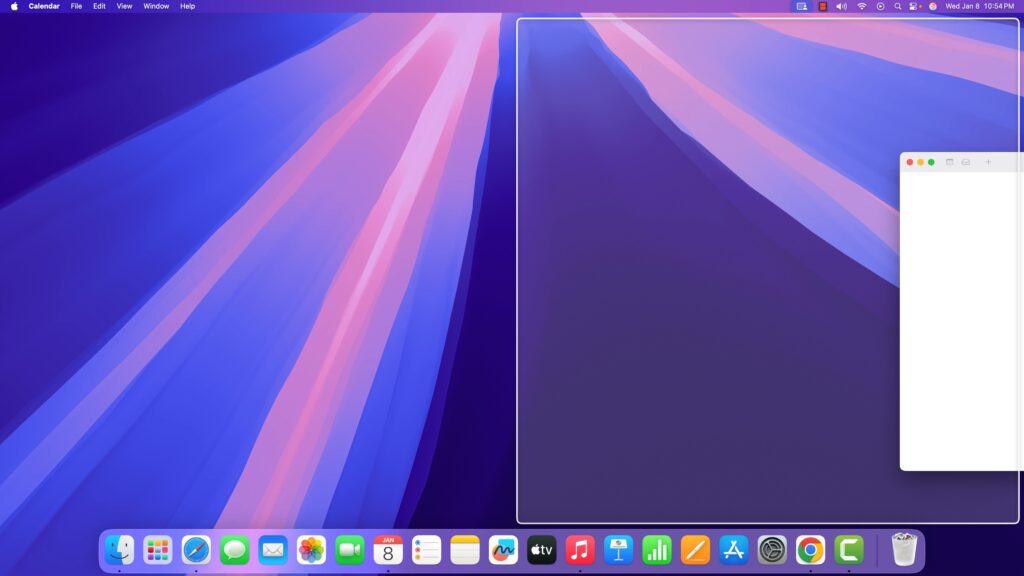
4. You can also tile windows in the four corners of your screen for even better multitasking. Simply drag a window to any of the four corners, and it will tile accordingly, allowing you to have up to four windows on your screen at once.
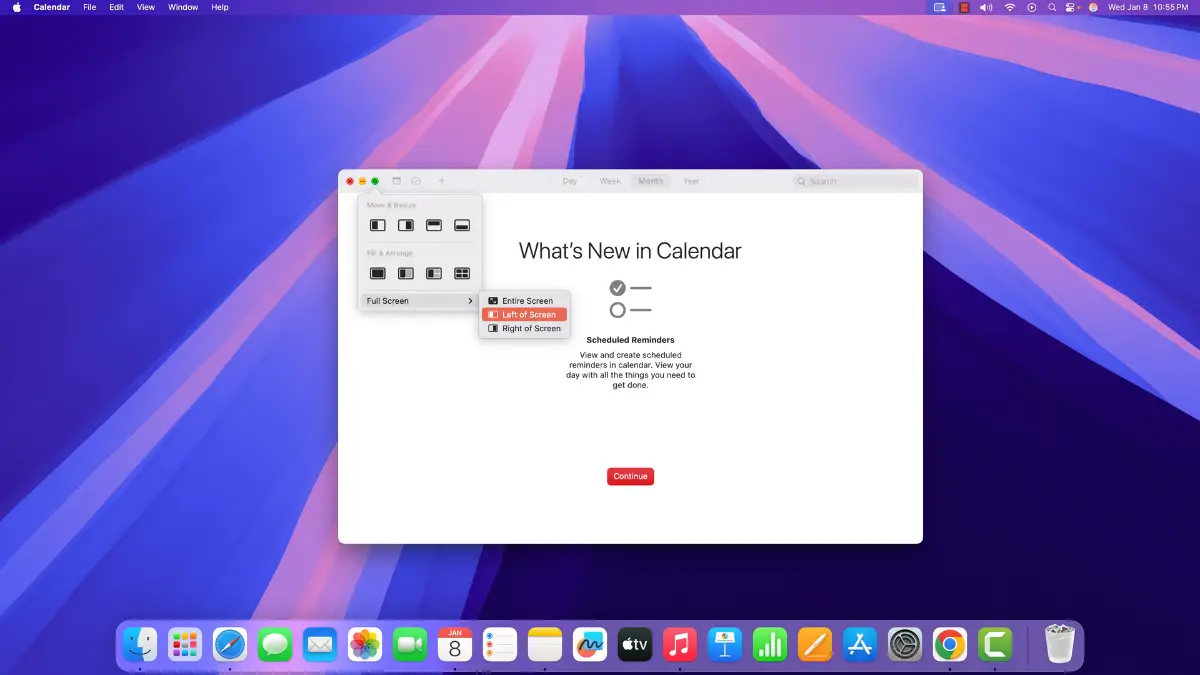
2. Using the Green Maximize Button
Here’s another quick and easy way to use the window tiling feature—it’s super intuitive and saves time.
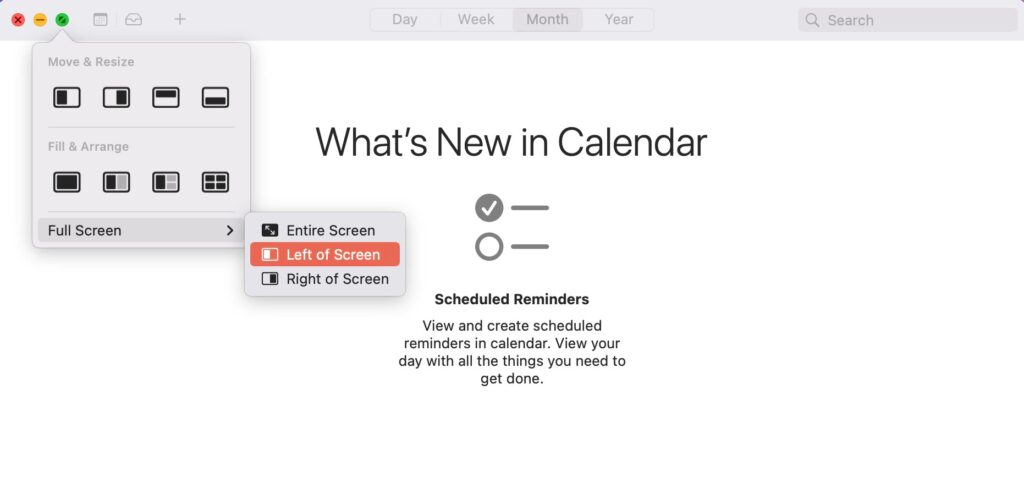
Just hover your mouse over the green button (the full-screen button) in the top-left corner of any window. Instead of simply maximizing it, a few tiling options will pop up, letting you snap the window to one side, a corner, or even maximize it with a single click.
In just a couple of clicks, you can organize your windows however you like. Whether you want two apps side by side or a neat four-window grid, this feature gives you the flexibility to set things up quickly without missing a beat. It’s a simple yet powerful tool to keep your workspace tidy and your productivity on point.
Conclusion
And that’s it! You now know how to make the most out of the Window Tiling feature on macOS. Whether you prefer to drag your windows manually or use the green button, this feature helps you stay organized and boosts your productivity.
However, if you’ve noticed, a small gap between the tiled windows gives them a slightly raised, pop-out effect. While this might be visually appealing, it can reduce screen space efficiency. You can disable the window tiling margin if you prefer a tighter layout without gaps. We’ve covered this in detail, follow the linked guide for step-by-step instructions.
