Python is a versatile and powerful programming language used for data analysis, data visualization, machine learning, web development, and more. For developing Python programs, there are many source code editors and IDEs available. However, Visual Studio Code is widely used for Python development as VS Code offers a wide range of features and extensions for Python development.
To use Visual Studio Code (VS Code) for Python, you’ve to set it up correctly for a smooth coding experience. In this guide, we’ll walk you through the steps to set up Python for Visual Studio Code on Windows.
Why use VS Code for Python?
There are popular IDEs for Python development, such as PyCharm. However, VS Code is widely used as a Python editor due to its lightweight and highly customizable option.
Additionally, it comes with Python extensions that offer powerful features like syntax autocomplete, linting, debugging, unit testing, Git integration, virtual environments, notebooks, editing tools, and the ability to customize the editor.
Here are some reasons why VS Code is preferred for Python:
- Cross-platform: VS Code is available for Windows, macOS, and Linux, making it an excellent choice for developers using different operating systems.
- Extensions: You can enhance VS Code with various extensions, including those tailored specifically for Python, which provides features like code linting, debugging, and code formatting.
- Integrated Terminal: VS Code has an integrated terminal, allowing you to run Python scripts and manage your virtual environments without leaving the editor.
- Version Control: You can seamlessly integrate Git and other version control systems into your workflow.
Now, let’s dive into the steps to set up Python for Visual Studio Code.
Prerequisites for Python on VS Code
To use Visual Studio Code for Python development on the Windows operating system, you need to install and correctly set up all the required files.
Here are the prerequisites for Python on VS Code:
- Python Interpreter
- Visual Studio Code
- Python Extension for VS Code
So, here we’ll comprehensively cover all the steps to properly set up VS Code for Python. Without further ado, let’s get started with the guide.
Installing Python Interpreter
To do Python programming on the Windows operating system, we need to install the latest Python interpreter. This is the first step we need to take. To install the Python interpreter, follow the steps mentioned below:
1. Open any browser and visit python.org to download the latest version of Python interpreter for the Windows operating system.
2. Click on Downloads. This will take you to the download page for Windows.
3. Here, click on Download Python 3.10.7 and wait for the download to complete.
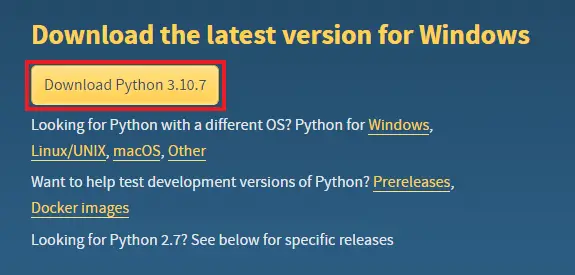
4. After the download is completed, open the installer file to install Python.
5. Now, on the setup window, check the box labeled Add Python 3.10 to PATH.
6. Then, click on the Customize Installation option, as we’re going to install Python with pip and IDLE.
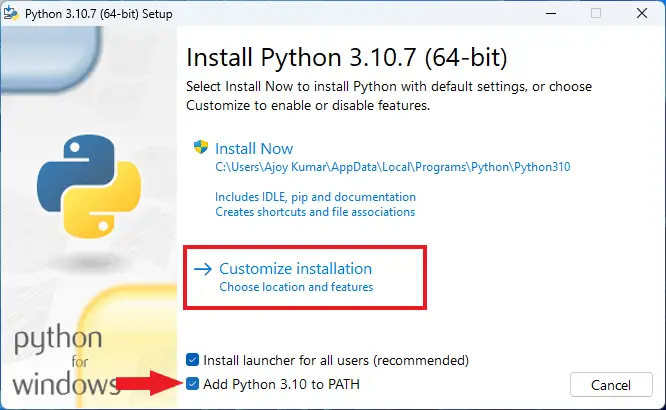
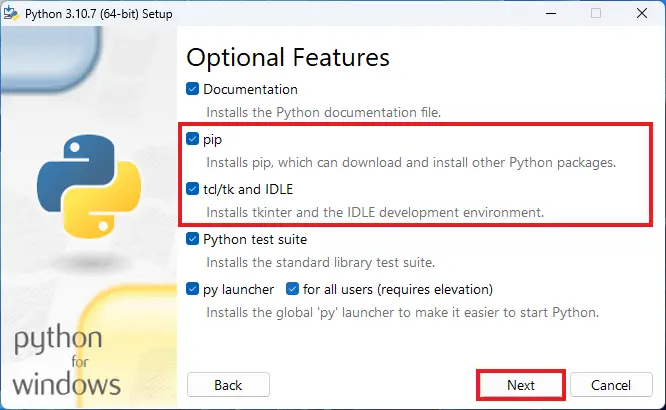
7. Here, select the checkboxes for pip, tcl/tk and IDLE, then click on Next.
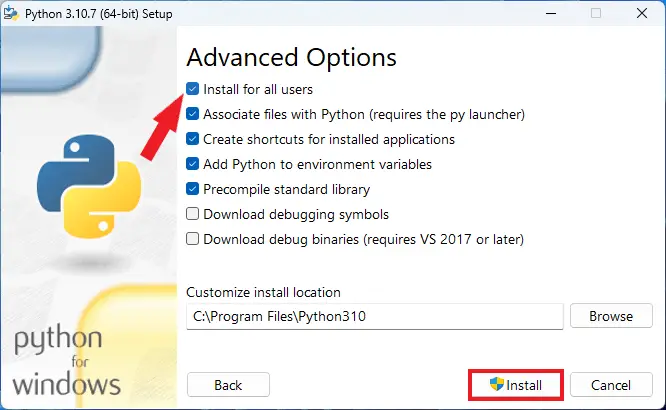
8. After that, select the Install for all users option and click on the Install button.
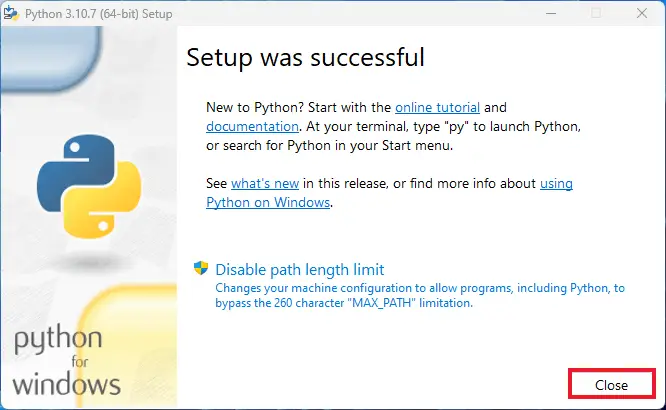
9. The installation will take some time, wait for the installation to complete. Once done click on the Close button.
Installing Visual Studio Code on Windows
After downloading and installing the Python interpreter on your device, you can proceed with the next steps. Now, you need to install Visual Studio Code. To do that, follow the steps outlined below:
1. Visit code.visualstudio.com and download the Windows version of Visual Studio Code.
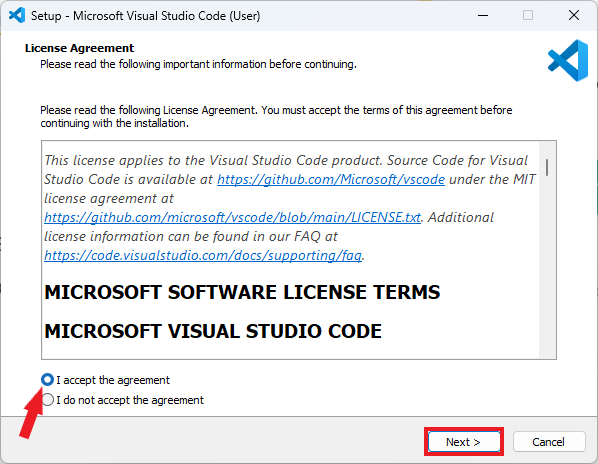
2. After downloading the installer file, open it. A setup window will appear. Read the license agreement, accept it, and then click Next to continue.
3. Now, choose the installation location and click Next to continue.
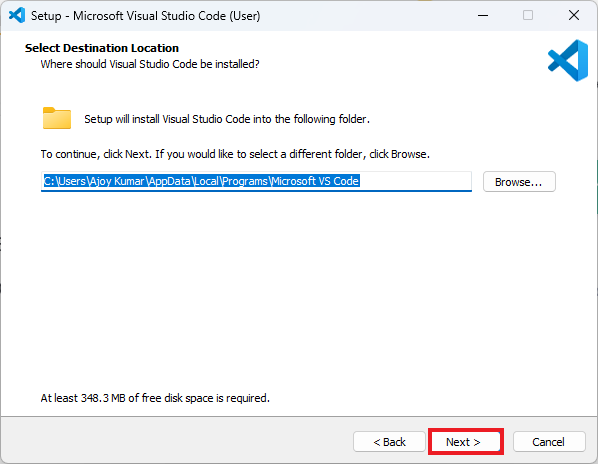
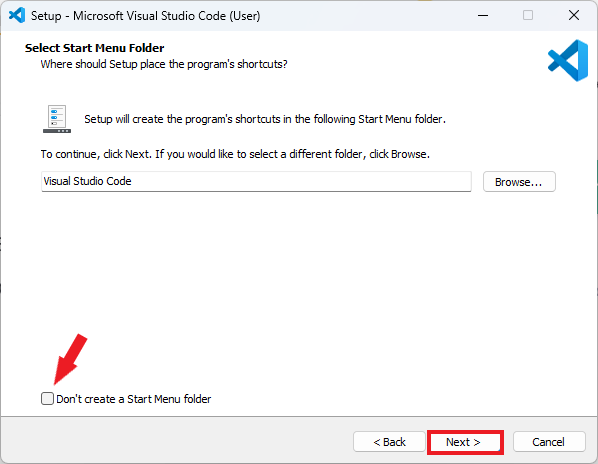
4. Provide a name for the Start Menu folder and then click Next to proceed.
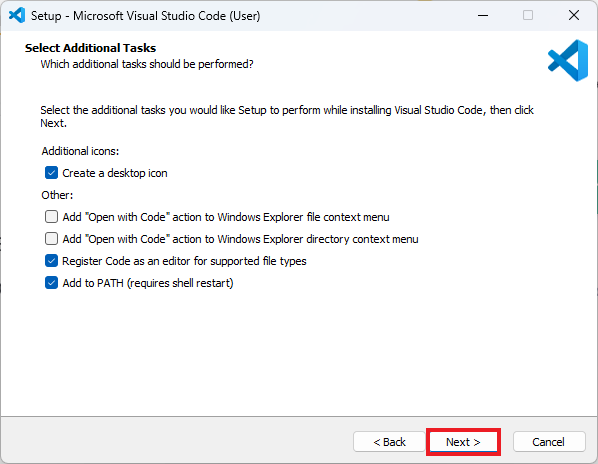
5. In the next window, click on the Create a desktop icon and select the Add to PATH option.
6. Then, click Next to continue.
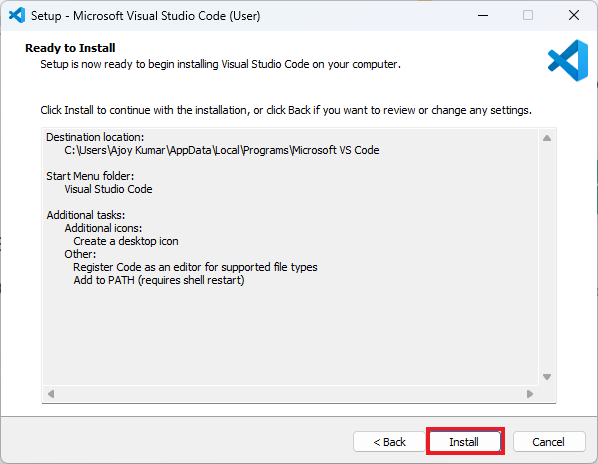
7. Finally, review the VS Code installation and click the Install button to begin the installation.
8. The installation will take some time to complete the process. Once it’s done, click the Finish button.
That’s it; we’ve successfully installed and set up Python and VS Code on Windows 11. Now, to start writing Python code in Visual Studio Code, we’ve to configure it. To do so, follow along with the complete guide.
Set up Visual Studio Code for Python on Windows 11
Once you’ve installed all the prerequisites, let us now set up the environment for Python development in Visual Studio Code.
1. Installing Python Extension
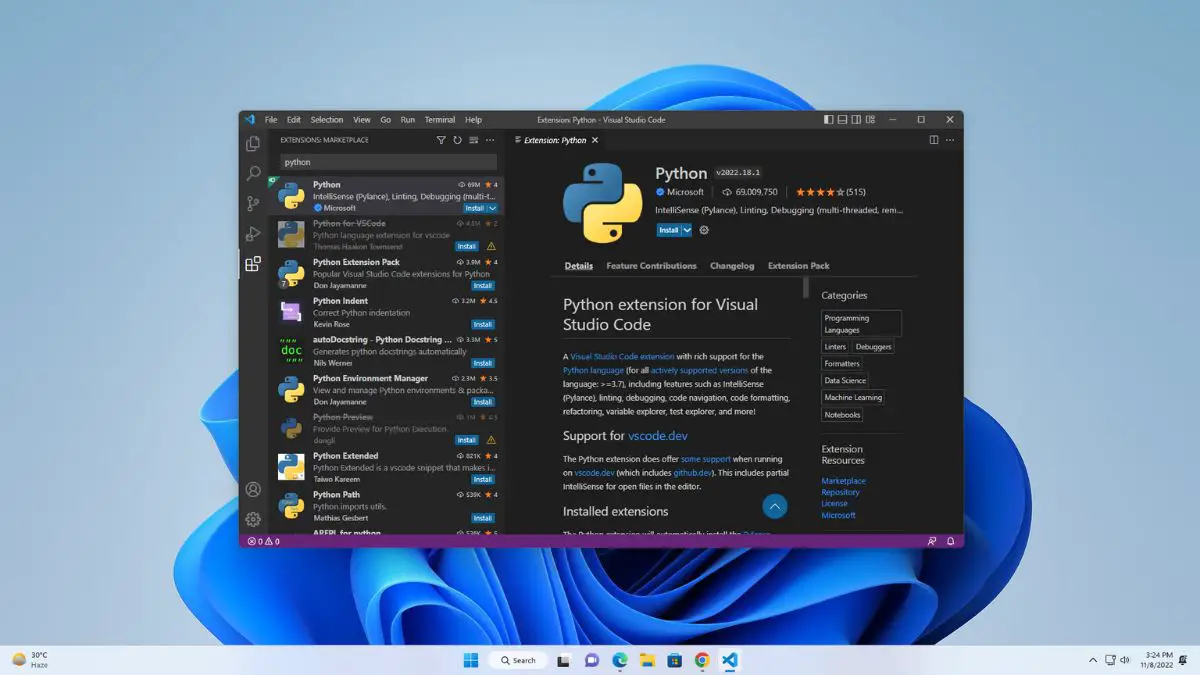
Without installing the Python Extension in VS Code, you can still do Python programming. However, if you want to enhance your Python programming, you can install the Python extension. It adds support for code completion, debugging, IntelliSense, and testing features. It also adds tools for data science, web development, and more.
Here are the steps you can follow to install the Python Extension in VS Code:
1. Open Visual Studio Code.
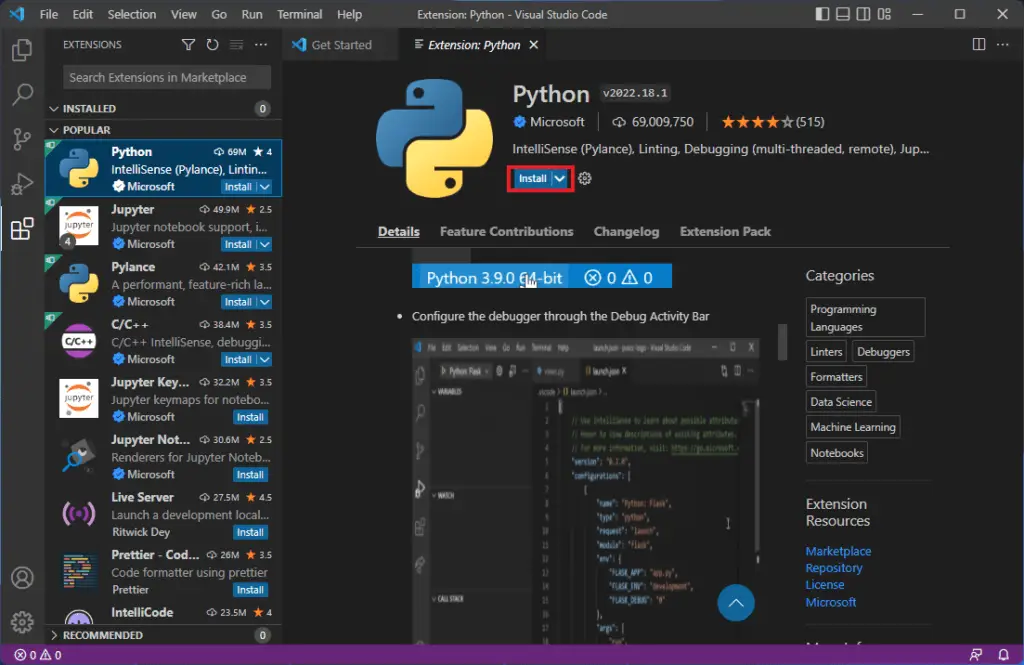
2. Click on the Extension icon to open the Marketplace.
3. Here, type Python in the Search Extensions in Marketplace bar. After that, from the search results, click on Python and click on the Install button.
4. After the installation is complete, reopen the Visual Studio Code to apply the changes.
2. Writing and Running Python Programs on VS Code
Once you’ve set up Python in Visual Studio Code, let’s discuss how to write and run Python programs in Visual Studio Code. For that, follow the following steps:
1. Open VS Code.
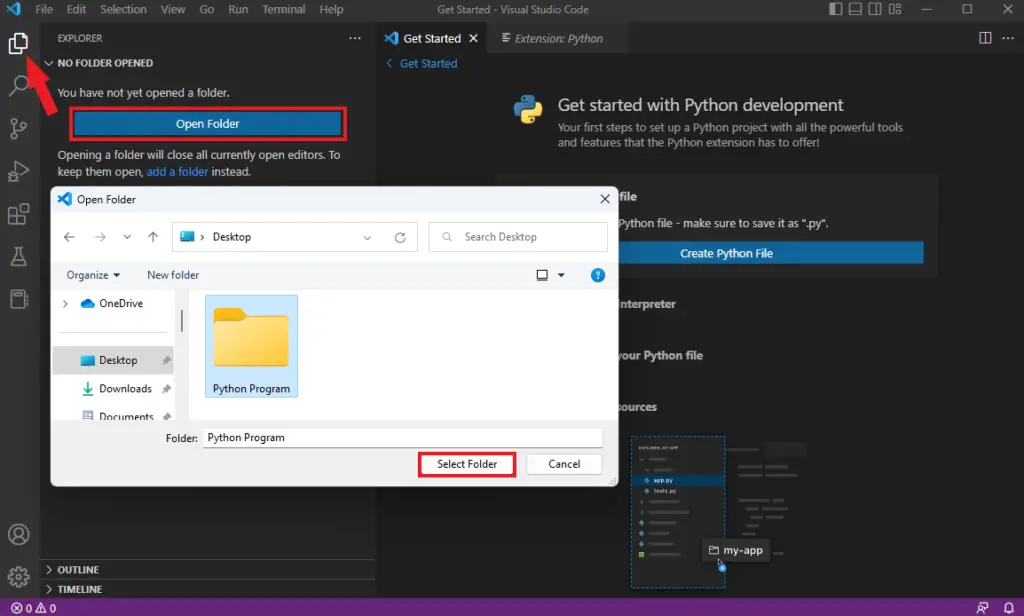
2. Click on the Explorer option, then click on the Open Folder button.
3. Now, select the location where you want to save the Python program or create a new folder for your Python project.
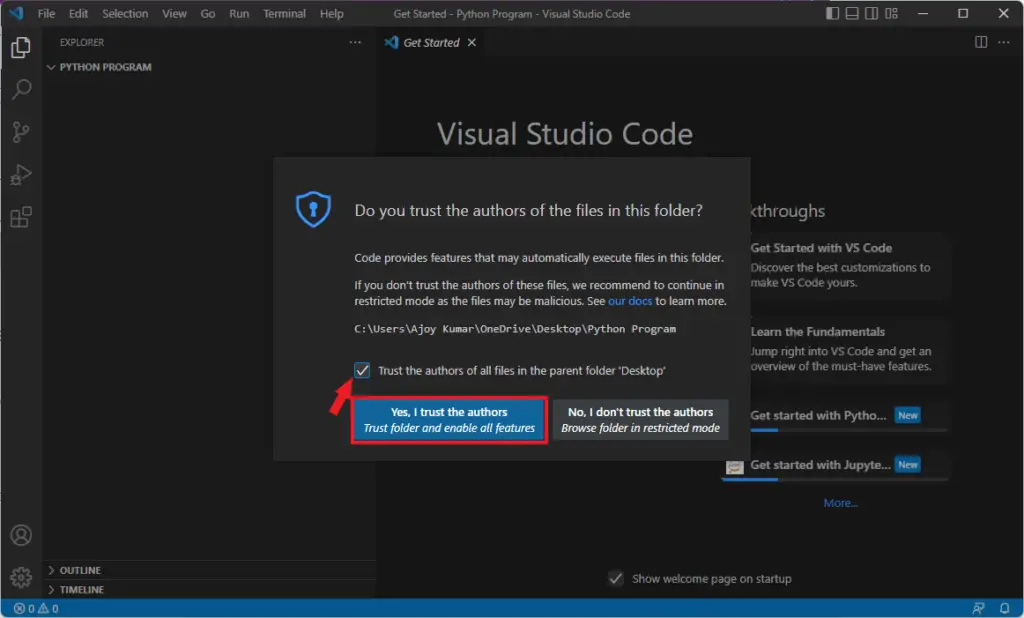
4. You’ll receive a pop-up: Do you trust the authors of the files in this folder? Here, select Trust the authors of all files in the parent folder.
5. Then click on the Yes, I trust the authors button.
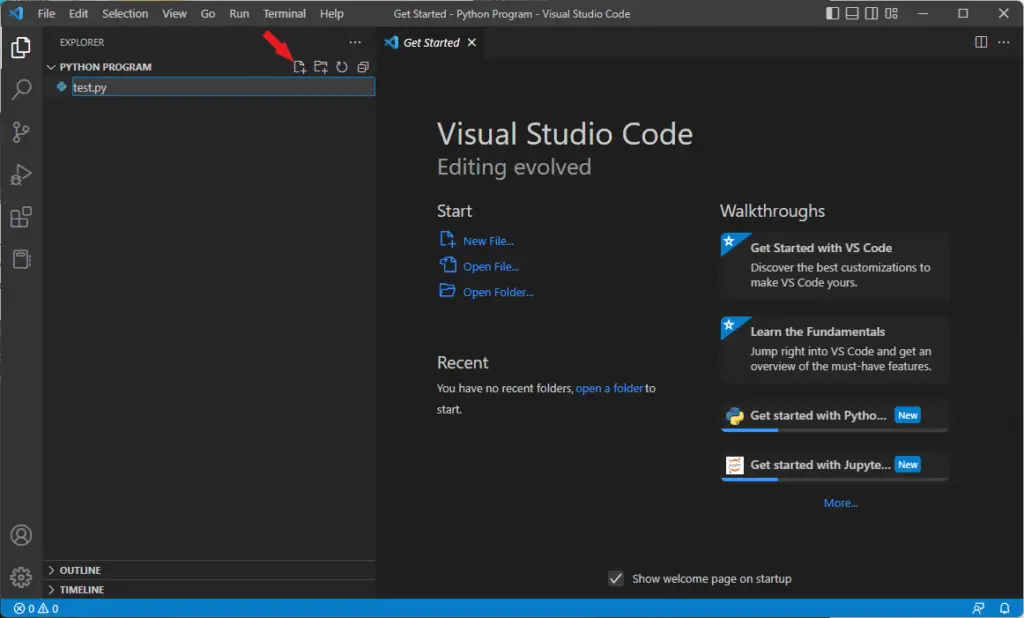
6. Once you’ve selected the location for your Python project, let’s learn how to create a Python file. For that, click on the New File icon.
7. Then, name your file with the .py extension, and it will create a new Python file.
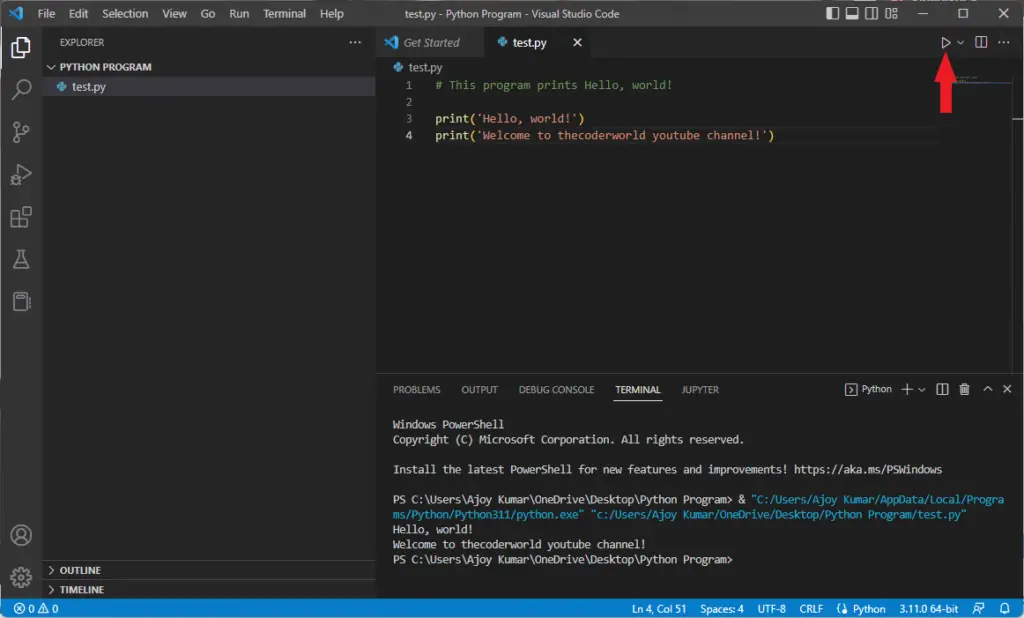
8. Now you’re ready to write your Python program. Here is a simple Python program that you can try to run in VS Code.
# This program prints Hello, world!

print('Hello, world!')
print('Welcome to Coding Lap youtube channel!')
9. After writing the code, press Ctrl + S to save it.
10. Then, click the Run button to execute the Python code, and you should get your output in the Terminal area.
Install Essential VS Code Python Extensions
Here is the list of useful Python extensions in Visual Studio Code:
- Pylance: It offers powerful language support for Python, including features like auto-completion, type checking, and more.
- MagicPython: It improves syntax highlighting for Python code, making it more readable.
- Python Test Explorer: It allows you to run and debug Python tests directly from VS Code.
- Jupyter: It provides support for Jupyter notebooks within Visual Studio Code.
- autoDocstring: It generates Python docstrings automatically to speed up your Python programming.
Conclusion
Now, you’re all set with Python development on VS Code. That’s it! This is how you can set up Python for Visual Studio Code on Windows 11. With the right extensions and configurations, you can take advantage of the powerful features that VS Code offers for Python development, making your coding experience more efficient and enjoyable.
