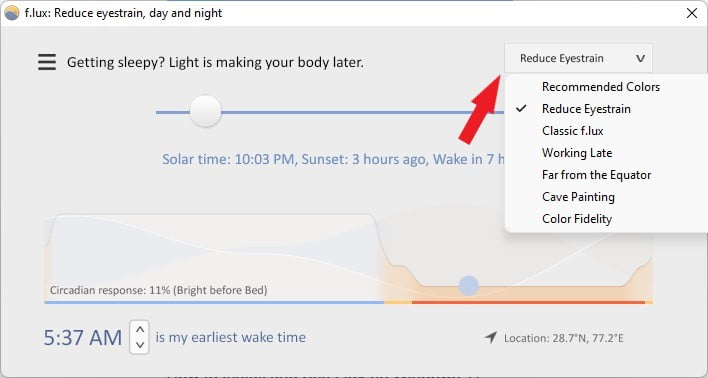
f.lux is software that will help you adjust the color temperature of your computer screen. If you work for a very long period of time in front of your computer. Then f.lux will help you to reduce eye strain by adjusting the display color temperature. Here, we are going to discuss how to install and set up f.lux on Windows 11 to filter the blue light emitted from the display.
In addition, we will guide you; on how you can enable the blue light filter using the Windows default settings. However, it has limited features. If you want some unique features, then our suggestion is f.lux.
How to Install and Use f.lux on Windows 11
Here in this section, we are going to discuss how to install and use f.lux on Windows 11. If you are using a Windows 10 computer, then also f.lux will work flawlessly. For that, follow these steps:
1. Open any browser, visit justgetflux.com, and download f.lux for the Windows operating system.
2. To download click on the Download f.lux button.

3. After the download has been completed install the software. To install it, open the .exe file and accept the license agreement by clicking on the Accept button.

4. After it gets installed, you have to restart your computer. For that click on the Restart Now button.

5. Now open the f.lux software. Here, you have to set your local location so that it can set sunset and sunrise timing to the software.

6. After that, you are ready to use f.lux. Now you can adjust your display color temperature and even you can adjust the sunset and sunrise temperature of your screen. You can also select the f.lux temperature scheme from the drop-down menu.

Yes, it comes with lots of other unique features. But if you don’t like to use any third-party software to adjust your display color temperature. Then you can use the Windows default Night Light feature, it’s functionality is the same as f.lux.
How to Enable Night Light in Windows 11
Here, we are going to discuss how to enable and use Night Light in Windows 11. Night Light can be easily enabled in Windows 11 settings.
For that, follow the steps below to turn it on:
1. Click on the Windows icon to open the Start Menu and click on Settings as shown in the image below.

2. Then, from the left panel of the Settings window, select the System tab. Then, on the right side of your screen, click the Display options.

3. Here you will find the Night Light option, just turn on the toggle to enable the night light mode on Windows 11.

Conclusion
That’s it; this is how you can install and use f.lux on Windows 11. Further, if you want to customize the night light mode, then you can check out our guide on how to customize the night light mode on Windows 11.
We hope this article was helpful to you. If you liked the article, share it with your friends. If you have some suggestions or doubts, do not hesitate to leave them in the comments section.


