If you’re searching for a reliable VPN for your Mac, NordVPN is one of the best choices. NordVPN has earned its reputation as one of the most popular VPN services due to its fast connection speeds, robust security features, and extensive server network. Whether you’re aiming to enhance your online privacy, secure your connection on public Wi-Fi, or access region-restricted content, NordVPN offers a user-friendly solution.
In this guide, we will walk you through the process of installing and using NordVPN on macOS. So, without further ado, let’s get started.
How to Install NordVPN on macOS
NordVPN provides a simple and effective way to secure your MacBook’s internet connection. Whether you want to protect your sensitive information on public Wi-Fi, prevent online tracking, or access geo-restricted content, NordVPN has you covered. Below is a step-by-step guide on how to install NordVPN on macOS.
1. Open any web browser on your Mac and visit NordVPN’s official website.
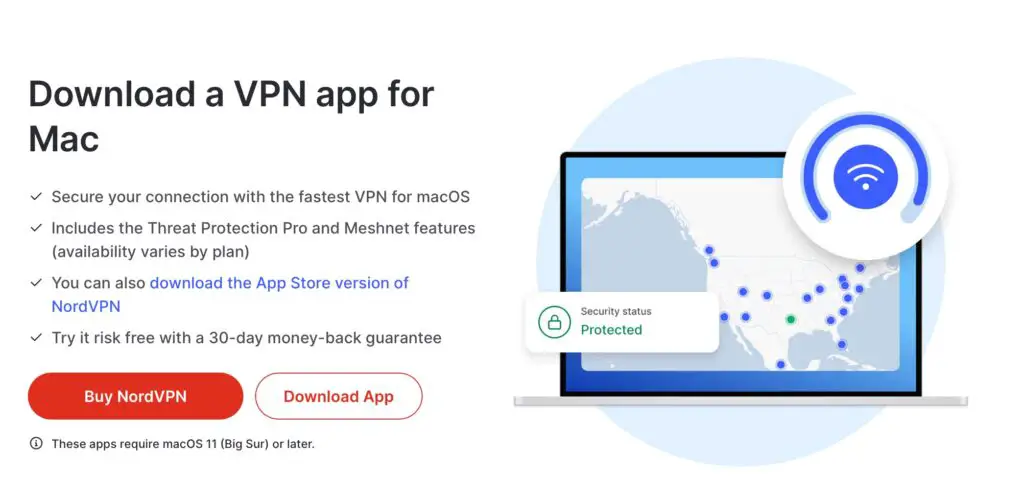
2. On the website, click the Download VPN option.
3. Select macOS as your operating system from the drop-down menu.
4. Click the Download App button to start the download.
5. Once the download is complete, open the installer file.
6. Click Continue when prompted.
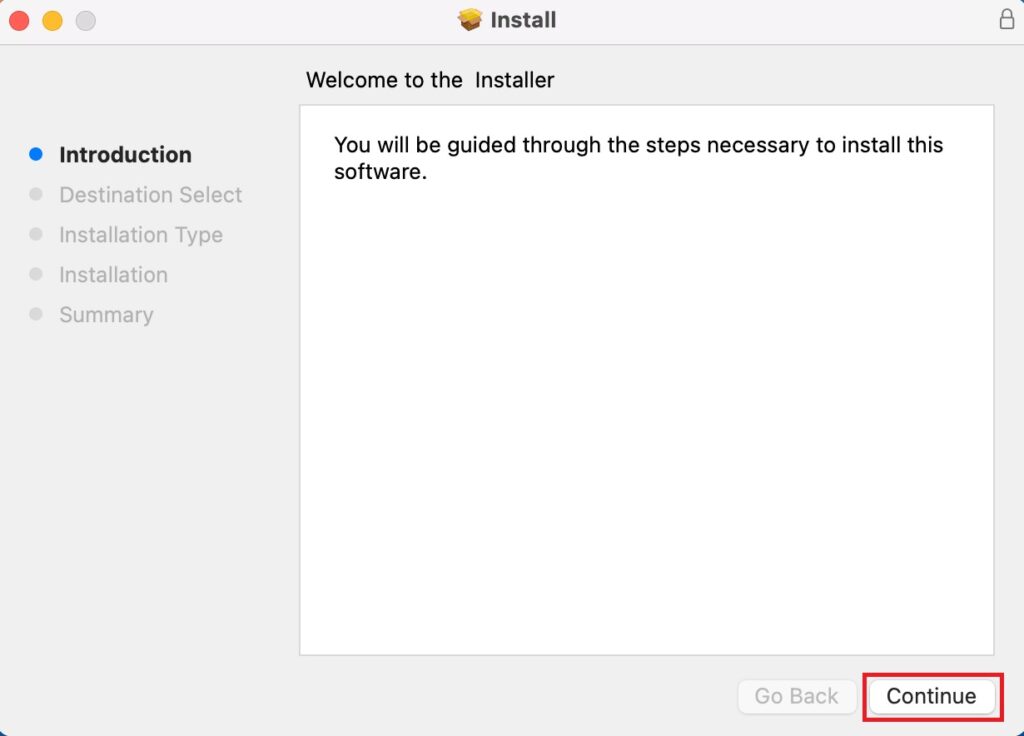
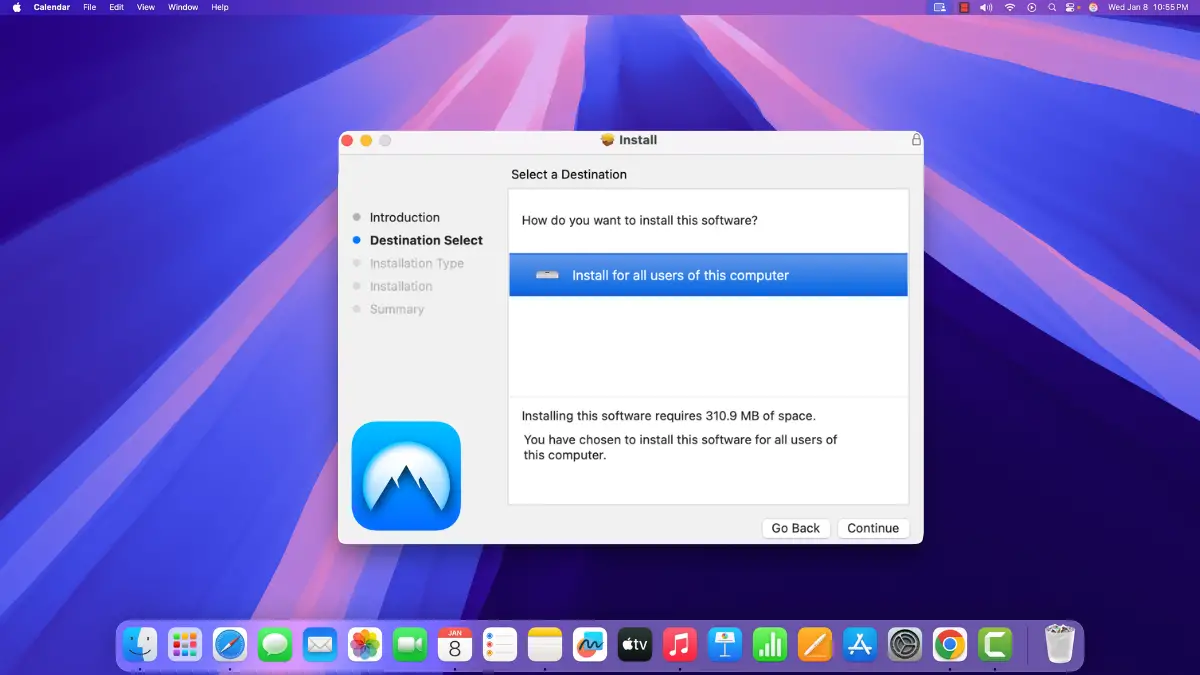
7. Now, follow the installation steps, such as selecting the destination, and installation type, and clicking Continue at each prompt.
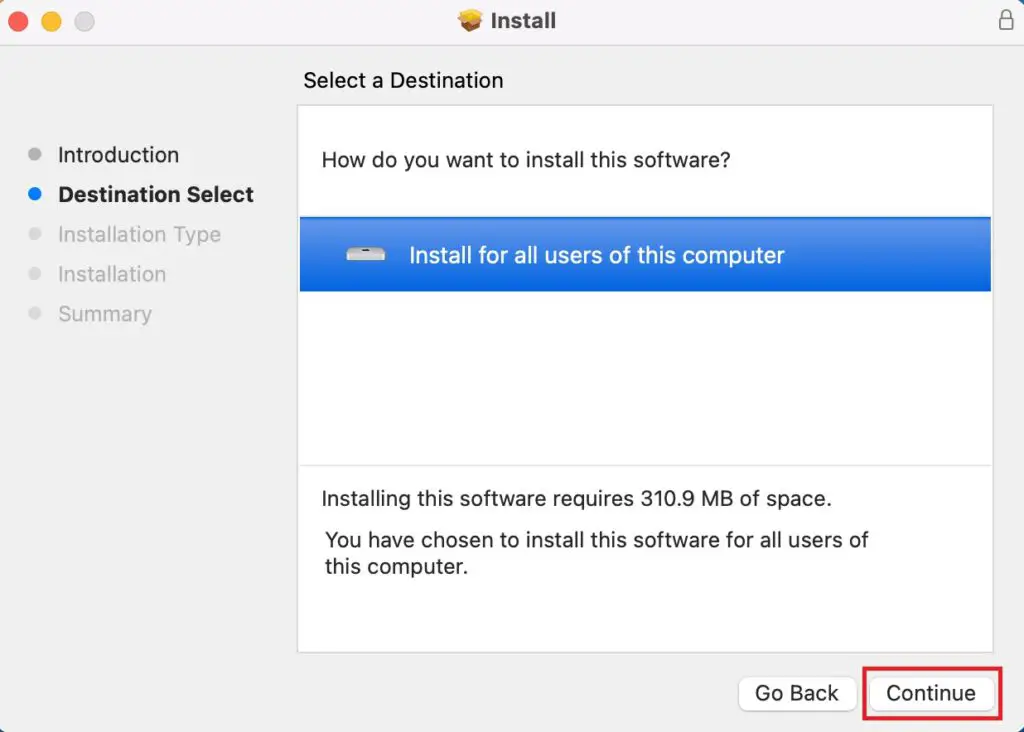
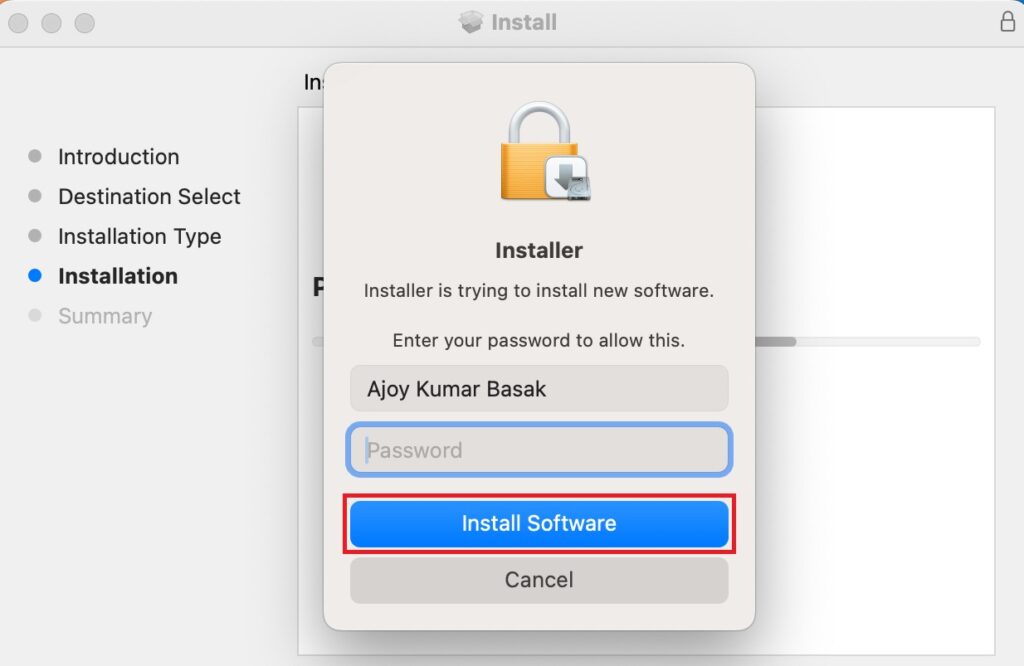
8. When you’re ready, click Install and enter your system password when prompted to authorize the installation. Then, click Install Software and wait for the installation process to finish.
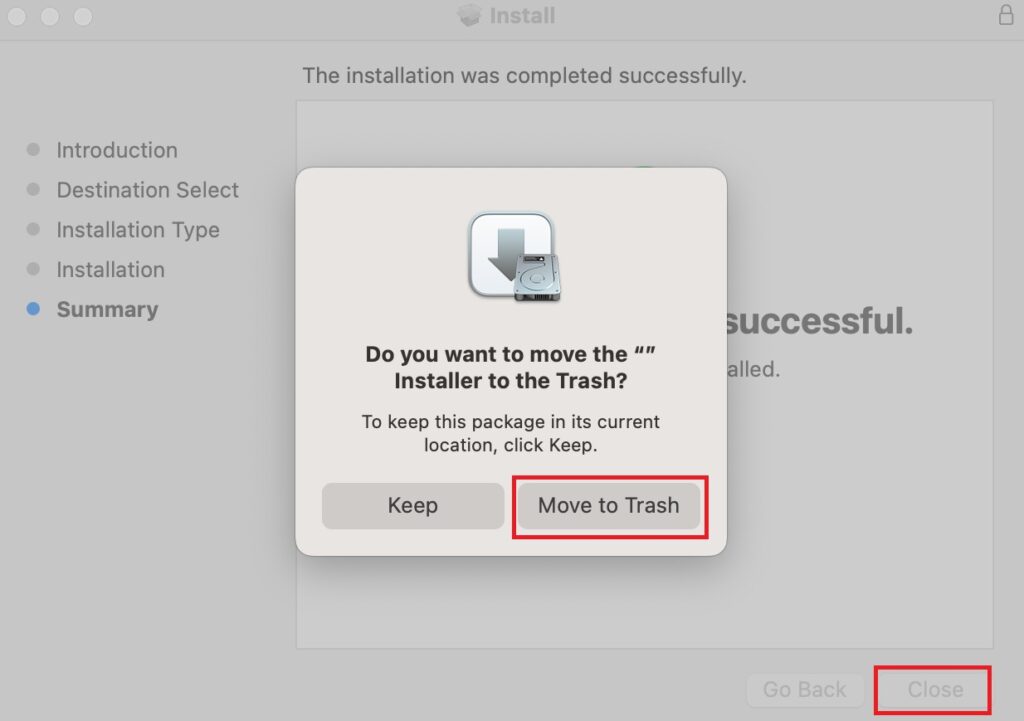
9. Once completed, click Close to exit the installer.
10. If you want to remove the installer file, click Move to Trash when prompted.
That’s it! You have successfully installed NordVPN on your Mac. However, to start using the service, you need to create a NordVPN account and subscribe to a plan, as it is a paid VPN service. NordVPN offers several subscription options, including monthly, yearly, and multi-year plans, all of which come with a 30-day money-back guarantee.
If you’re looking to save money, keep an eye out for special offers—NordVPN frequently provides discounts on long-term plans. You can currently get a 75% discount by subscribing through the affiliate link.
How to Use NordVPN on macOS
Once you have subscribed to a plan, you are ready to use NordVPN. Here’s how you can log in, select your desired VPN location, and start using it:
1. Open Launchpad and locate the NordVPN application.
2. Click on the NordVPN icon to launch the app.
3. Click on the login option and Sign in with your NordVPN account credentials.
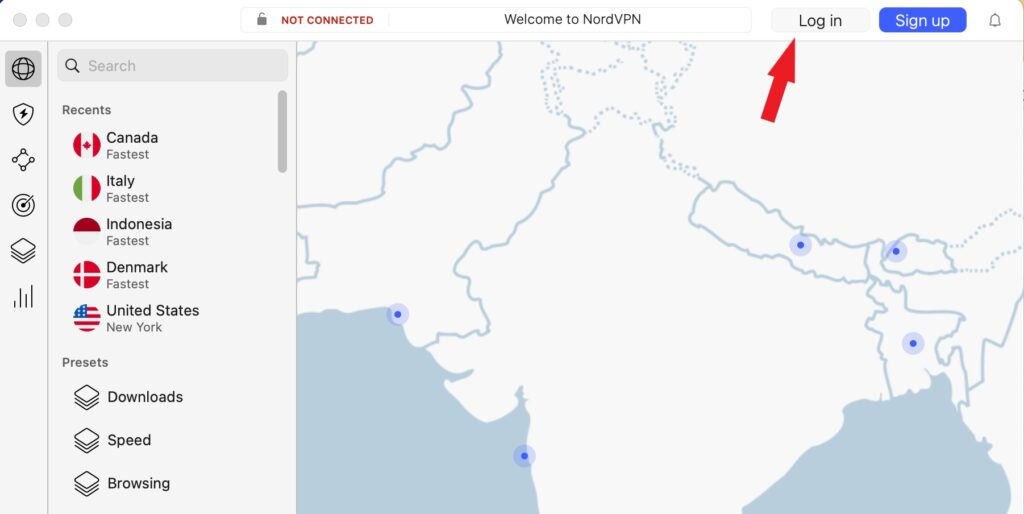
4. After signing in, click on the globe icon, select or search for the location, and select it. You are now connected to the VPN network.
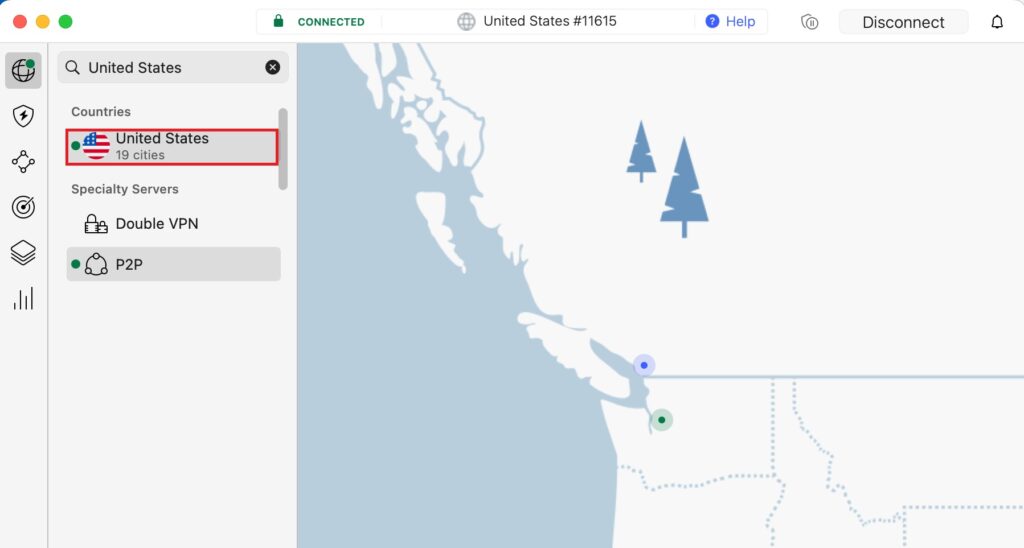
Once you’re done, you’re all set! You can now enjoy secure and private browsing with NordVPN on your macOS. With NordVPN, your online activity is shielded from prying eyes, and your personal information remains safe. That’s it! You’ve successfully installed and set up NordVPN on your Mac, ensuring that your internet connection is fully protected.
