Dark mode has quickly become a favorite feature for many users, thanks to its eye-friendly interface and sleek, modern appearance. It offers a more comfortable viewing experience, particularly in low-light environments, by reducing the amount of bright, glaring light on the screen. This is especially beneficial during late-night work sessions when bright screens can cause eye strain or disrupt your sleep cycle.
Not only does dark mode enhance visual comfort, but it also gives your Mac a stylish, updated look that many users find aesthetically pleasing. Whether you’re editing documents, browsing the web, or working on creative projects, the soothing dark theme can help you focus more effectively.
In this guide, we’ll walk you through the simple steps to enable dark mode on your Mac using two quick methods: through System Settings and Control Center. Both are convenient options, allowing you to switch to dark mode with just a few clicks.
How to Enable Dark Mode on macOS
Dark mode isn’t just a system-wide setting, it also affects the native macOS apps such as Safari, Mail, and Notes, which will automatically switch to dark mode when enabled.
Additionally, many third-party apps like Spotify, Microsoft Office, and Adobe products also support dark mode, providing a consistent dark theme across your Mac.
To enable Dark Mode on your Mac, follow these simple methods:
1. Using System Settings
Enabling dark mode on macOS is quick and easy through the System Settings. This method allows you to make the change at a system-wide level, which means that most native macOS applications and some third-party apps will automatically switch to dark mode.
Here’s how to do it:
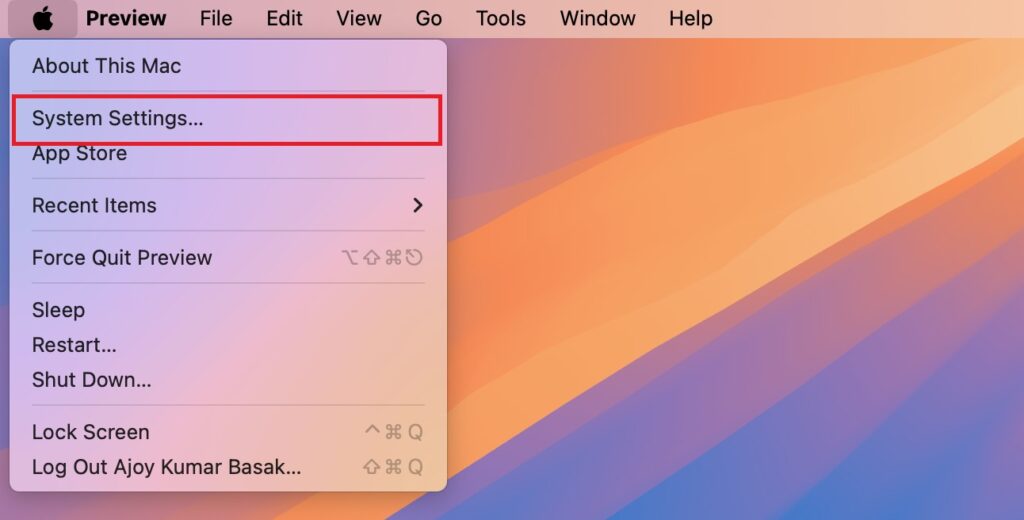
1. Click on the Apple logo in the top-left corner of the screen and select System Settings.

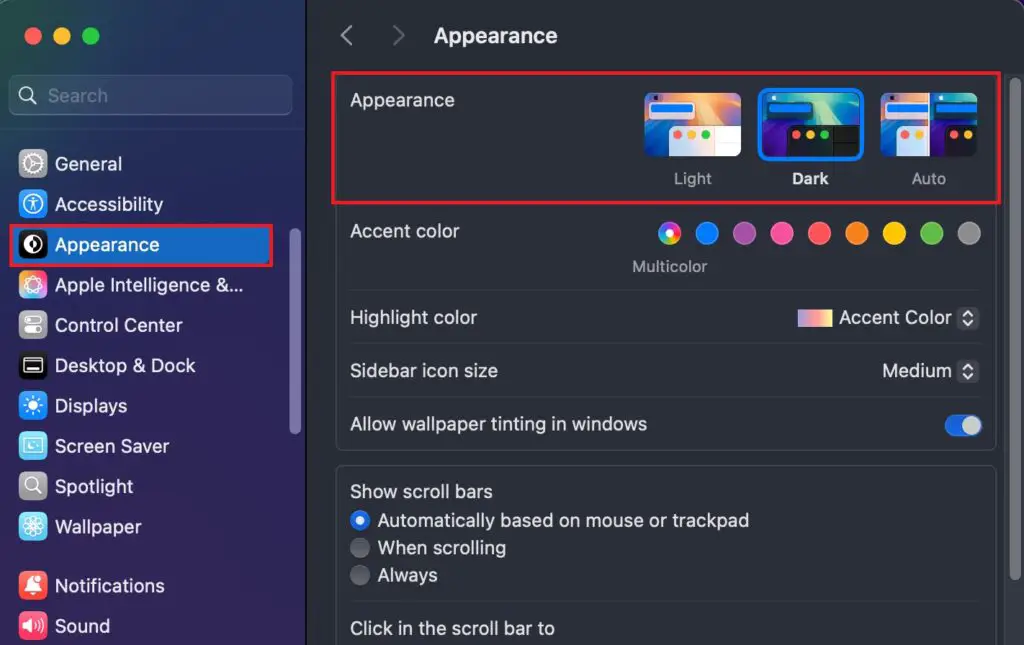
2. In the System Settings window, choose Appearance from the sidebar.
3. You will see three options under Appearance: Light, Dark, and Auto.
- Light: The traditional light mode.
- Dark: This option enables the dark mode for the entire system interface.
- Auto: This option automatically switches between light and dark mode based on the time of day. In general, it switches to light mode during the day and dark mode at night.
4. Select Dark to enable dark mode across your macOS system.

5. From here, you can also change the accent color to suit your preference.
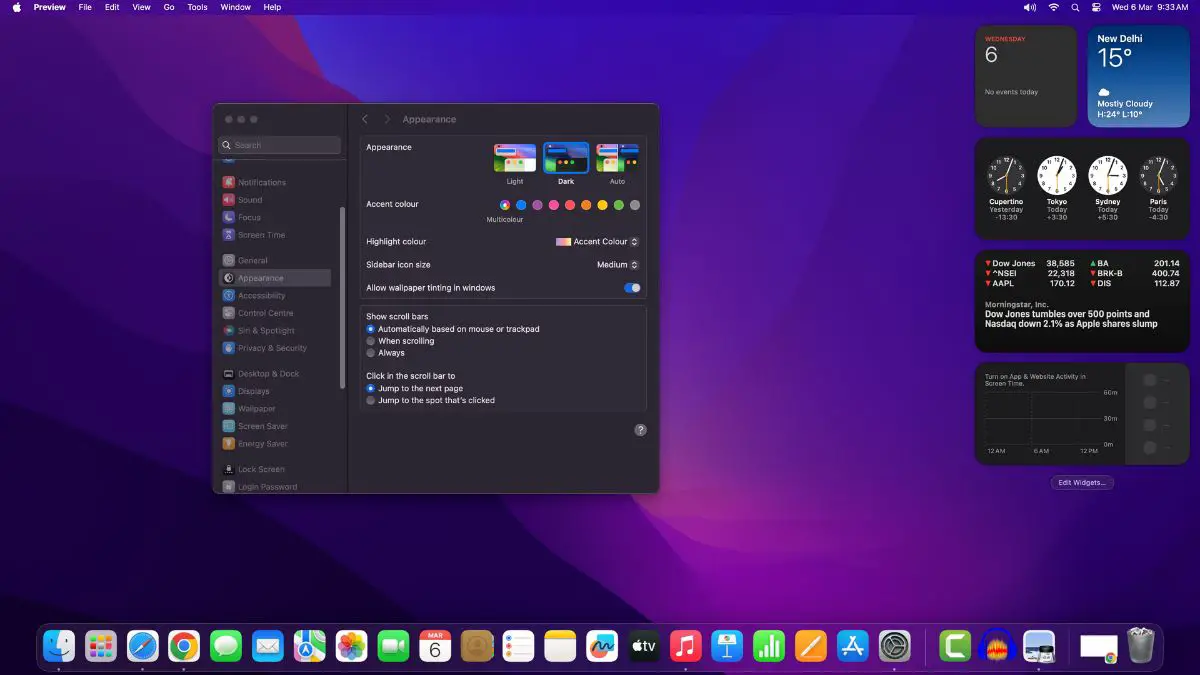
Once you’ve done this, all elements of your macOS interface will change to Dark Mode. From the menu bars to native macOS apps and third-party apps that support the feature, everything will now have a dark color scheme that’s easier on your eyes.
2. Using Control Center
For users looking for a quicker and more temporary solution, the Control Center on macOS also allows you to toggle dark mode. This method can be especially helpful when you want to switch modes without diving into System Settings.
Here’s how to do it:
1. Click on the Control Center icon located at the top-right corner of your screen.
2. In the Control Center menu, find the Display section.
3. Click on the display option.

4. From here, you can quickly toggle between Light and Dark modes without opening the full System Settings.

Now, the system, including the menu bar, dock, and supported apps, will appear in dark mode. This method is convenient if you want to make a temporary switch but prefer not to navigate through the deeper settings.
Conclusion
Enabling dark mode on your macOS is a great way to reduce eye strain, especially in low-light environments, while also giving your device a modern and sleek look. Whether you choose to use the System Settings for a more permanent change or the Control Center for a quick toggle, macOS provides easy options for customizing your appearance.


